Sunday, November 15, 2015


Monday, October 19, 2015
Sweet and Salty Snack Bars
I love Kind fruit and nut bars, but I'm not a fan of the ingredient list. Of course, I had to find a way to make my own. I've played with this a few times, but could not quite get them to stick together the way they should. This time I increased the "sticky" stuff, and I believe I have something that works! These things taste great, have minimal ingredients, and you can keep them in the freezer for a quick snack whenever you need it! ~ C
 1.5 cups raw cashews and raw almonds (You can sub any nut in here that you like, or increase the seeds for a nut free version.)


1/2 cup raw sunflower seeds
1/2 cup raw pumpkin seeds
1/2 cup raisins (or craisins, dried blueberries, etc)
1/2 cup Enjoy Life chocolate chips
1/2 tsp sea salt
1 tablespoon ground flax
1 tbsp chia seeds
1/2 tsp sea salt
1/4 plus two tbsp maple syrup
1.5 tbsp almond butter
Preheat oven to 325 degrees.
Line an 8x8 pan with parchment paper (Don't skip out on the parchment paper. Trust me.)
Mix the maple syrup and almond butter together until they are well mixed.
Put all other ingredients in a bowl and toss until mixed. Add in the syrup mixture, and make sure everything is well coated, and that the flax, chia seeds and salt get mixed in throughout.
Pour into the pan, and bake for 15 minutes.
Allow to cool completely and place in fridge for about two hours before trying to cut.
Cut into bars, and wrap individually in saran wrap, to make it easy. Store in fridge for a week, or put in a ziploc bag, in the freezer, to grab and go!

Monday, August 24, 2015
3 ingredient Pumpkin Pancakes
School started today, so I'm in the mood for fall. That means pumpkin season!! This little recipe is quick to whip up, minimal ingredients, and grain free! I hope it's a hit in your family, too!

Ingredients:
1/4 cup pumpkin purée (I used canned)

Ingredients:
1/4 cup pumpkin purée (I used canned)
1/2 banana (mashed)
2 eggs
Optional:
1 tsp Pumpkin spice seasoning
1/2 tsp vanilla
Chocolate chips
Whisk together all ingredients and pour on to a hot, greased, skillet or griddle, over medium heat. Flip when pancakes start to bubble on top.
Enjoy!
Sunday, August 23, 2015
Sunbutter Banana Chocolate chip muffins
My boys are creatures of habit. They want some type of chocolate chip muffin every.single.morning for breakfast. Their eczema is flaring, so I'm trying to cut out all wheat and dairy again to see if it improves. Since I have a ton of coconut flour in the pantry, I experimented a little to come up with a filling muffin that still has their coveted (demanded) chocolate chips in it. These turned out great, and are going into our on hand freezer rotation! (Did you know that you can freeze any of our muffin recipes, and just thaw or microwave for 30 seconds? Makes preparing lots of muffins at a time well worth it!) ~ C

Ingredients
Wet Ingredients
3 bananas
1 tsp vanilla extract
1/4 cup Sunbutter* (or any nut seed butter)
1/8 cup applesauce
2 eggs
Dry Ingredients
Dry Ingredients
1/2 cup coconut flour
1/2 tsp baking soda
1/2 tsp baking powder
1/4 tsp sea salt
Add Ins
Add Ins
1/2 cup Enjoy Life chocolate chips
Preheat oven to 350 degrees. Grease muffin tins with coconut oil.
- Preheat over to 350 degrees. Grease your muffin tin with coconut oil or use liners.
- Mix all wet ingredients together in your mixer. Make sure the banana gets good and mashed up in the mixing process.
- While your wet ingredients are in the mixer, put all your dry ingredients together in a separate bowl and mix together with a fork or spoon.
- Add the dry ingredients to the wet ingredients in the mixer. Mix until well blended.
- Add the "add ins" and mix by hand, or on the mixers lowest setting.
- Pour into muffin pan and cook for 25 to 30 minutes. Muffins are done when toothpick inserted in middle comes out clean.
*Note: Sunbutter may take on a greenish hue in the baking process. Do NOT be alarmed. In fact, your kids may think it's pretty cool. If you want to teach your kids a science lesson, check out this science fair winner on the Sunbutter website!


Wednesday, July 29, 2015
Homemade Spinach Basil Pesto (Nut Free!)
I like to sneak veggies in anywhere I can. Sometimes it's easy, sometimes I have to get a little creative. One of my favorite easy recipes is Spinach Basil Pesto. This time of year Basil is easy to come by, so I get a few plants, and make a batch to keep in the freezer. Before we started our "real food lifestyle" easy mac was my go to food on my lazy mom nights. Now, I just add some Pesto from the freezer to whole wheat pasta, and my boys are happy! They have no idea they are eating spinach either. I'm not gonna tell.
I've also used this as a base for homemade pizza, rather than tomato sauce. Now, the hubby and I prefer it!
This recipe is so easy to throw together in the blender, and have fresh pesto sauce in minutes. You can use some right then, and then freeze the rest in ice cube trays for later!

So grab the blender, an empty ice cube tray, and go!
Ingredients:
4 cups fresh spinach leaves
I've also used this as a base for homemade pizza, rather than tomato sauce. Now, the hubby and I prefer it!
This recipe is so easy to throw together in the blender, and have fresh pesto sauce in minutes. You can use some right then, and then freeze the rest in ice cube trays for later!

So grab the blender, an empty ice cube tray, and go!
Ingredients:
4 cups fresh spinach leaves
2 cups fresh basil
1/4 cup parmesan blend
2 cloves minced garlic
1/2 cup Olive oil
1 tsp Salt
1/2 tsp Pepper
Place all ingredients in Blender (I use my Ninja), and blend until all the leaves are finely chopped. This only takes a minute or so.
 Once it is the right consistency, you can spoon it out into ice cube trays. Place in freezer, and leave until its fully frozen. Usually I just leave it overnight.


Place all ingredients in Blender (I use my Ninja), and blend until all the leaves are finely chopped. This only takes a minute or so.


Once it is set, you can place the individual "Pesto cubes" into a ziploc freezer bag. These usually keep for about 6 months in the freezer.

When I make pasta for the kids, I typically add two cubes to boiled, drained whole wheat pasta. You can dress it up with some fresh tomato, and even add some diced chicken for a big kid meal! ~ C

Tuesday, July 28, 2015
Whole Wheat Blueberry Zucchini Muffins
Blueberries and Zucchini. The two things that we can't get enough of this time of year. Or, maybe I am getting too much and trying to get creative in how I use them? Either way, this recipe is another example of me hiding veggies in my kids foods. They get their muffins, and I get the satisfaction of knowing there is another veggie actually being ingested and NOT spit out. Once again, I am using bananas in place of honey, maple syrup or other sweeteners. Don't worry, your kids won't know the difference.
These are versatile, and can be a great addition to breakfast OR lunch. Enjoy! ~ C

Ingredients
Wet Ingredients
2 bananas, broken into 1 to 2 inch pieces.
These are versatile, and can be a great addition to breakfast OR lunch. Enjoy! ~ C

Ingredients
Wet Ingredients
2 bananas, broken into 1 to 2 inch pieces.
1/2 cup applesauce
1/4 cup maple syrup
2 eggs
1 tsp vanilla extract
Dry Ingredients
Dry Ingredients
1 tsp cinnamon
1/4 tsp salt
1/4 tsp salt
2 cups whole wheat flour
1 tsp baking soda
Add ins
Add ins
1 cup shredded zucchini
1 cup fresh blueberries
- Preheat over to 350 degrees. Grease your muffin tin or use liners. (I love these reusable silicone ones sold by Amazon.)
- Mix all wet ingredients together in your mixer. Make sure the banana gets good and mashed up in the mixing process.
- While your wet ingredients are in the mixer, put all your dry ingredients together in a separate bowl and mix together with a fork or spoon.
- Add the dry ingredients to the wet ingredients in the mixer. Mix until well blended.
- Add the "add ins" and mix by hand, or on the mixers lowest setting.
- Pour into muffin pan and cook for 25 to 30 minutes. Muffins are done when toothpick inserted in middle comes out clean.
Sunday, July 26, 2015
Strawberry Chocolate Hazelnut Dessert Pizza - Using RawMio's Chocolate Hazelnut Spread
We got a new patio set last weekend, and of course we felt the need to break it in immediately. We decided to make our first night dining al fresco with the new set a little extra special by grilling out with family. Thanks to some inspiration from some good friends of ours, we decided to skip the usual cookout suspects and went with a variety of gourmet grilled pizzas, including a dessert pizza, instead.
My husband is the pizza chef and the grill master in our house, so I left this all up to him; as usual, he did not disappoint. He made his signature Southwestern barbecue chicken pizza, a kid-friendly margherita pizza, and the fan favorite - Strawberry Chocolate Hazelnut Dessert Pizza. Our friends that inspired our gourmet pizza cookout actually made a very similar strawberry dessert pizza for us recently that we enjoyed so much we wanted to re-create it using RawMio's amazing Chocolate Hazelnut Spread. ---Seriously, if you try any of their spreads you cannot go wrong with this classic - it is good enough to eat straight off a spoon; in fact, I'm pretty sure that would have been its fate had hubby not used it for the pizza.---
Today I am sharing the super simple Strawberry Chocolate Hazelnut Dessert Pizza recipe; this one was the biggest hit with both the adults and kids, and it was also the simplest to make. Don't worry, though! I will keep working on hubby to write a blog post, so he can share his amazing Southwest barbecue chicken recipe in the future; that one is a bit more involved.
Strawberry Chocolate Hazelnut Dessert Pizza
 |
The Finished Product!Ingredients:
Dough (makes enough for 2 small thin crust pizzas)
1 cup all-purpose flour
2 cups white whole wheat flour (We're partial to King Arthur's)
1 tsp salt
1 tsp active dry yeast
1 Tbsp honey (or sugar to make vegan)
1 tsp cinnamon
1 1/2 cups lukewarm water
1/4 cup flax meal or other whole grain (optional) - the flax meal adds a great texture to the dough
Toppings
1 jar (6 oz) RawMio Chocolate Hazelnut Spread
1/2 pint sliced strawberries, more if desired
Powdered sugar for dusting (optional)
 Directions:
6-12 hours before cooking time: Combine all of the dough ingredients in a large bowl. You can use a stand mixer if you'd like, but the dough will be so wet that it won't knead well so I just use a wooden spoon. As soon as everything is mixed in, cover the bowl with a towel and leave it alone in your kitchen for 6-12 hours. If you want to do this the night before, just throw it in the fridge after mixing. The small amount of yeast and long rise time helps the flavors develop and makes it easy to roll out into thin pizza crusts.
30 minutes before cooking time: Warm up the oven or grill as hot as you can get it, ideally to about 550°.
Sprinkle a large flat surface with corn meal or flour. Place half of your dough on the surface and dust with flour. It will still be sticky, so you may need up to another half cup of flour to roll it out. Flip and knead the dough for 2 minutes, adding a dusting of flour as you go, until it doesn't stick to your hands anymore. Make sure the surface still has a dusting on it as you go too, so you can easily pick it up and flip it over. With a rolling pin, roll it into a pizza crust shape (about 10-14" diameter) as thin or thick as you want it; we prefer a thinner crust for the grilled version. If needed, keep adding flour so it doesn't stick to the surface.
If you're using a pizza pan, add a dusting of corn meal or flour to the pan, then flip your crust onto it.
5 minutes before cooking time: With a spoon, add the hazelnut spread to the crust, like you would for pizza sauce. I microwaved it for 20 or 30 seconds to soften it up and make it easy to move around. Add strawberry slices as a topping.
Put the pan in the oven or on the grill for 5-15 minutes, depending on how crispy you like your crust and how thick the dough is. When it starts to brown, you're done. Sprinkle with powdered sugar immediately before serving.
You can do this directly on the grill without a pan. After the crust rests, put it directly on the grill grate for 1-2 minutes. Flip it over, quickly add the spread and toppings, then cook covered for another 2-3 minutes.
|
 |
| RawMio Chocolate Hazelnut Butter Thanks, again, to RawMio for providing me with your amazing Hazelnut Spread. I'm hooked, and I can't wait to try some new flavors! |
Note: While the RawMio spread was provided free of charge, the opinions and idea reflected in this article are solely mine. This stuff is seriously DELISH!
Easy Plantain Blender Pancakes (Grain free & Dairy Free)
If you're looking for a quick, easy fluffy, grain free pancake that tastes good, then you've found it! I've been experimenting with plantains as a flour substitute and so far I've been really happy with the results. Using green plantains does not add a plantain flavor, and the end result is a fluffy pancake with a flour like texture.
The great thing about this recipe, is all you need to do is dump the ingredients into a blender, then pour into the pan. Add any toppings as soon as you put in pan and you're all set!

Depending on the type of blender you have, you may want to blend these at two separate times. First after the plantains and coconut oil, then after the remaining ingredients.
Ingredients
2 green plantains, cut/broken into 1-2 inch pieces.
2 tbsp coconut oil
Blend
2 eggs
1 ripe banana*
1 tbsp coconut flour
1/4 tsp sea salt
Blend
Pour into frying pan, using coconut oil to coat the pan. I find they are easiest to flip sand dollar size.
Top with chocolate chips or blueberries (or other topping) as soon as you pour into pan. Let sit for a minute or two, to allow to firm on one side, before flipping.
My kids and husband love these! Hope you enjoy them, too! ~ C
*I've been using a ripe banana in place of honey or maple syrup in my recipes and it's worked out great. No kid complaints here!
Sunday, July 19, 2015
Whole Wheat Chocolate Oatmeal Cookies - Made with RawMio Almond Chocolate Chip Cookie Dough Spread
Anyone else out there a fan of all of the different varieties of nut and cookie butters? My personal favorite before switching to a more whole food based diet was speculoos cookie butter from Trader Joe's, so when RawMio offered to send me a jar of their Almond Chocolate Chip Cookie Dough spread I was so excited. My family and I have tried it a few different ways now, including straight off a spoon (because who can resist?!), on toast, and in the cookie recipe I'm sharing today.
This spread is seriously yummy and loaded with all kinds of super foods. I personally like it best when it's in a warmer form since it takes off a little of the edge from the raw almonds and takes on a little more of the dry-roasted almond flavor I love. In order to really highlight the cookie dough flavor of the spread I added cocoa powder to the cookies; the cocoa powder majorly enhances the flavor of the cacao in the spread.
This spread is seriously yummy and loaded with all kinds of super foods. I personally like it best when it's in a warmer form since it takes off a little of the edge from the raw almonds and takes on a little more of the dry-roasted almond flavor I love. In order to really highlight the cookie dough flavor of the spread I added cocoa powder to the cookies; the cocoa powder majorly enhances the flavor of the cacao in the spread.
 |
| The finished product! |
Whole Wheat Chocolate Oatmeal Cookies
Ingredients
Virgin coconut oil, softened
2 tbsp raw honey (use maple syrup for vegan version)
½ cup RawMio Almond Chocolate Chip Cookie Dough spread
¼ cup cocoa powder
1 egg (use flax egg for vegan version - how to make a flax egg)
1 tsp vanilla
¾ cup white whole wheat flour
½ tsp baking powder
½ tsp baking soda
¼ tsp salt
½ cup oats

½ cup RawMio Almond Chocolate Chip Cookie Dough spread
¼ cup cocoa powder
1 egg (use flax egg for vegan version - how to make a flax egg)
1 tsp vanilla
¾ cup white whole wheat flour
½ tsp baking powder
½ tsp baking soda
¼ tsp salt
½ cup oats

Instructions
1. Preheat the oven to 350°. Grease cookie sheet or use Silpat to
line cookie sheet.
2. Add the coconut oil and honey to a large mixing
bowl, and cream using an electric mixer. Next, add cookie dough spread, cocoa powder, egg,
and vanilla to mixture; mix until combined.
3. In a medium mixing bowl, sift the flour, baking
soda, and baking powder together; add salt. Stir to combine. Add the oats to
the other dry ingredients, mix until combined.
4. Slowly add the dry ingredients to the wet
ingredients, stirring to combine as you add the dry mixture.
5. Using a cookie scoop, form tablespoon-sized
balls and place the balls on the prepared cookie sheet about 2” apart. Use a
fork to flatten the cookies slightly and form a cross-hatch pattern.
6. Bake for 9 minutes on the middle rack of preheated oven. Remove from oven and let cool on the cookie sheet for 2-3
minutes before moving to a cooling rack. Let cool completely before enjoying.

Stay tuned for more recipes using RawMio products.... If you would like to check out more of their products you can head over to their website http://rawmio.com/.
Note: All featured products were provided free of charge, but the opinions are solely my own.

Stay tuned for more recipes using RawMio products.... If you would like to check out more of their products you can head over to their website http://rawmio.com/.
 |
Monday, June 29, 2015
Chipotle Black Bean Mango Salad
Lately I have been wanting Southwestern flavors non-stop, so I have been testing all kinds of new Mexican and Southwestern recipes to satisfy the craving. In my hunt I stumbled across this super tasty burrito bowl recipe from Damn Delicious. It is so tasty and a great substitute for my favorite Burrito Bowl from Chipotle, but it's a little heavy to eat as frequently as I want. I really liked the flavor combination and could seriously have eaten her burrito bowl everyday for lunch, so I have been tweaking her recipe and I finally came up with the perfect vegetarian salad I can eat for lunch everyday guilt-free. Here is my newest food obsession -

Chipotle Black Bean Mango Salad

Salad Ingredients:
2-3 cups chopped lettuce of your choice, washed (I like red leaf or romaine)
1/2 cup black beans, rinsed
1 medium tomato, chopped
1/4 cup chopped mango
1/2 avocado, chopped
1/4 cup yellow or orange bell pepper, chopped (optional)
Cilantro for garnish, to taste (I'm a little heavy-handed with the cilantro as you can see)
Dressing Ingredients:
1/4 cup plain Greek yogurt or sour cream
1/4 cup salsa of your choice (I like to use a fresh salsa)
1 tbsp fresh lime juice
1/8-1/4 tsp ground Chipotle pepper - more if you like it extra smoky (I use Penzey's)
 |
I'm heavy-handed with the Chipotle because I can't get enough of the smoky flavor. |
Instructions:
In a salad bowl, layer the lettuce, black beans, tomato, mango, avocado, and bell pepper (if using). In a small bowl, stir Greek yogurt (or sour cream), salsa, lime juice, and ground Chipotle seasoning together until well blended. Pour the dressing over the layered salad, add cilantro, and toss ingredients until combined and coated with dressing. Enjoy!
Because we all know I love my gadgetry, I just had to add a little plug for the value of a mango slicer. If you haven't invested in a mango slicer yet, you seriously should! I picked one up for $0.60 at St. Vinny's a few months ago, and we have eaten more mango in the past few months than I think I have in my whole life. It is SOOO handy; I just put it over the stem, press down, and voila - 2 perfect halves of edible mango. After it's cut, I just scoop the fruit out with a spoon, just like an avocado. Here's a photo from today (because I was, of course, making this salad for probably the sixth time in 2 weeks).
 |
Perfectly Sliced Mango!! |
Monday, June 22, 2015
Almond Butter Blondies
As usual, I'm waiting until the last minute.. I need a quick dessert recipe for the Fathers Day lunch I'm hosting, and I want minimal ingredients. Off to Pinterst I go... I found a peanut butter brownie recipe that I thought I could modify and make work. This modified recipe is going to be a new favorite!!! We are a peanut free family, so I subbed almond butter, but any nut or seed butter will work.
This recipe is also dairy and soy free. You could sub the whole wheat flour for a gluten free flour as well.

Ingredients
1/3 cup melted coconut oil
1/2 cup raw almond butter
1/4 cup pure maple syrup
1/4 cup coconut sugar
4 eggs
1/2 cup almond flour or almond meal
1/2 cup white whole wheat flour
1 tsp baking powder
1/8 tsp salt
1 cup enjoy life chocolate chips
1/2 tsp vanilla
Directions
Preheat oven to 350 degrees.
Mix all liquid ingredients together in a bowl, except the melted coconut oil.
Gradually mix in the dry ingredients.
Then add in the melted coconut oil, stirring until mixed.
Lastly, fold in the chocolate chips.
Pour batter into a brownie pan.*
Bake for 30-40 minutes until toothpick in center comes out clean.
*I used a greased 9x11 brownie pan, but a square 9 inch pan will work, too.
Tuesday, June 16, 2015
Cold Brew Iced Coffee
OIt's officially summer in NC! No, it's not June 21st yet. But, with a forecast high temperature of 100 today, it is most definitely summer. Since it will be too hot to venture outside today, I'm stuck inside trying to come up with activities to keep two little ones occupied while I work. I need coffee! Iced, please.
There is nothing worse than pouring hot coffee over ice. You end up with warm, watery coffee. A couple of weeks ago I discovered Cold Brew coffee at Trader Joe's. This is the stuff dreams are made of. But, at $7 a bottle, I knew I needed to make my own. It's easy, and it is so much cheaper than buying it. Since I already make my own almond milk, I had everything I need to make it.

Kitchen Items Needed:
Nut bag or cheese cloth for straining
A pitcher or bowl that holds at least 4 cups
Ingredients:
4 cups of water
1 cup of your favorite ground coffee beans

Directions:
Combine water and coffee in a bowl or pitcher.
Let sit 12-24 hours in the fridge
Strain through nut bag to separate grounds from coffee.
Store in fridge for up to a week.*

*This recipe makes a strong concentrate coffee that you can mix with equal parts water or milk.

My favorite is served over ice, with unsweetened cashew milk, and liquid stevia. I've also blended these same ingredients with some dark chocolate powder to make my own healthy clean eating frappe. It is delicious!
For today, I went extra large size to survive the heat and two crazy boys!
There is nothing worse than pouring hot coffee over ice. You end up with warm, watery coffee. A couple of weeks ago I discovered Cold Brew coffee at Trader Joe's. This is the stuff dreams are made of. But, at $7 a bottle, I knew I needed to make my own. It's easy, and it is so much cheaper than buying it. Since I already make my own almond milk, I had everything I need to make it.
Kitchen Items Needed:
Nut bag or cheese cloth for straining
A pitcher or bowl that holds at least 4 cups
Ingredients:
4 cups of water
1 cup of your favorite ground coffee beans
Directions:
Combine water and coffee in a bowl or pitcher.
Let sit 12-24 hours in the fridge
Strain through nut bag to separate grounds from coffee.
Store in fridge for up to a week.*
*This recipe makes a strong concentrate coffee that you can mix with equal parts water or milk.
My favorite is served over ice, with unsweetened cashew milk, and liquid stevia. I've also blended these same ingredients with some dark chocolate powder to make my own healthy clean eating frappe. It is delicious!
For today, I went extra large size to survive the heat and two crazy boys!
Thursday, January 1, 2015
Bringing in the New Year with a Tropical Green Smoothie
Welcome to 2015, everyone! Anyone else anxiously awaiting for a hovercraft to materialize on their front step?! Maybe a Back to the Future marathon is in order to see just how far off Michael J. Fox and the gang were in predicting what 2015 would be like.
Instead, I'm settling for a Downton Abbey marathon accompanied by a cleansing green smoothie to help with the not so great food choices I made over the holidays. I'm going to share my favorite green smoothie recipe here, and I would love to hear yours in the comments. Happy New Year!
Tropical Green Smoothie Recipe
Ingredients:
- 1 cup whole plain yogurt

- 1 cup whole plain yogurt
- 1 cup spinach
- 1½
cups frozen tropical fruit mix (mango, pineapple, and strawberries)
- 1 banana
- ¼ cup water
Directions:
Add all ingredients into blender in the order listed. Blend using puree setting for ~1 minute or until desired consistency. Serve with a straw, and enjoy!
Note: if you notice the greens are not blending well enough, try blending the yogurt and spinach first and then adding the next 3 ingredients.
Sunday, December 21, 2014
Grain Free Cauliflower Pizza Casserole!
I came across a pin of a healthy "Pizza Casserole" on Pinterest, but could never find an actual recipe for it. (Isn't that the most annoying thing ever? Why pin it if you're not going to tell us how to make it??) Ok, rant over... It looked like it wasn't that difficult, so I threw this together for supper tonight, and was very pleased with the simplicity of it. The best part is that my boys are eating their veggies, without even realizing it!
--C

Ingredients:
4 cups cooked cauliflower, cut into bite size pieces.
1 cup freshly shredded mozzarella cheese
1 cup of your favorite marinara or pizza sauce
Toppings of choice. I used Boars Head Pepperoni
Preheat oven to 350 degrees.
In a bowl mix the cooked cauliflower, marinara and 1/2 cup of the shredded cheese.
Pour into a 2.8 liter (3 quart) casserole dish.
Top with remaining cheese and any additional toppings.
Bake uncovered for approximately 20-25 minutes, until cheese is melted and bubbly.
--C
Ingredients:
4 cups cooked cauliflower, cut into bite size pieces.
1 cup freshly shredded mozzarella cheese
1 cup of your favorite marinara or pizza sauce
Toppings of choice. I used Boars Head Pepperoni
Preheat oven to 350 degrees.
In a bowl mix the cooked cauliflower, marinara and 1/2 cup of the shredded cheese.
Pour into a 2.8 liter (3 quart) casserole dish.
Top with remaining cheese and any additional toppings.
Bake uncovered for approximately 20-25 minutes, until cheese is melted and bubbly.
Saturday, November 22, 2014
10 Stocking Stuffers & Gift Ideas for a Real Food Kitchen for Under $20
I'll be the first to admit that I have A LOT of kitchen gadgets, some of which I never use. However, now that we are doing so much cooking at home - much of which requires additional prep, like shredding our own cheese - I use a lot of the gadgets that used to sit idle.




Since Christmas is just around the corner, closely followed by New Year's resolutions, I thought I would put together a list of my top 10 kitchen gadgets for under $20. Tell me what you would add to the list in the comments section.
My 10 Favorite Kitchen Gadgets for Under $20
1. Box Grater - We no longer buy shredded cheese, so our box grater gets a workout. I personally like the graters that also include a receptacle to catch the cheese as you shred. Bonus: box graters work great for shredding vegetables, too.
My Pick: OXO Good Grips Box Grater - currently $17.95
2. "Y" Vegetable Peeler - Long before we committed to eating "real" food at home, we ate a lot of vegetables. Before we discovered the "Y" style vegetable peeler my husband always opted for a knife to peel fruit and veggies. However, the Zyliss Y peeler was a game changer for us - it's so effective and efficient that I peel raw acorn and butternut squash with it.
My Pick: Zyliss Vegetable Peeler - currently $9.99
3. Apple Corer - This is one of the tools I've had for a couple of years now that I rarely used until we made the switch to clean eating. Now I use this frequently to make pear and apple chips in our dehydrator, as well as to make peanut butter apple sandwiches for the girls' lunches.
My Pick: OXO Good Grips Corer - currently $8.95
4. Biscuit Cutter - This is another tool we have had sitting around for awhile, but we have only recently started using much. Homemade whole wheat biscuits have become a common fixture in our house, and thanks to this set of biscuit cutters we get a perfect size and shape each time. The smallest also works great for cutting crackers.
My Pick: RSVP Endurance Stainless Biscuit Cutters - currently $9.95
5. Silicone Baking Mat - We basically use our silicone baking mats every time we bake or roast anything. They are a great replacement for cooking spray and make cleanup a breeze. Now I can confidently ignore the directions to 'prepare' the pan with butter or cooking spray. We have both the 1/4 sheet size and the 1/2 sheet size, and I am seriously contemplating getting a second 1/2 sheet size just to have an extra because we use it that much.
My Pick: Silpat Non-Stick Silicone Baking Mat (Half Sheet) - currently $13.89
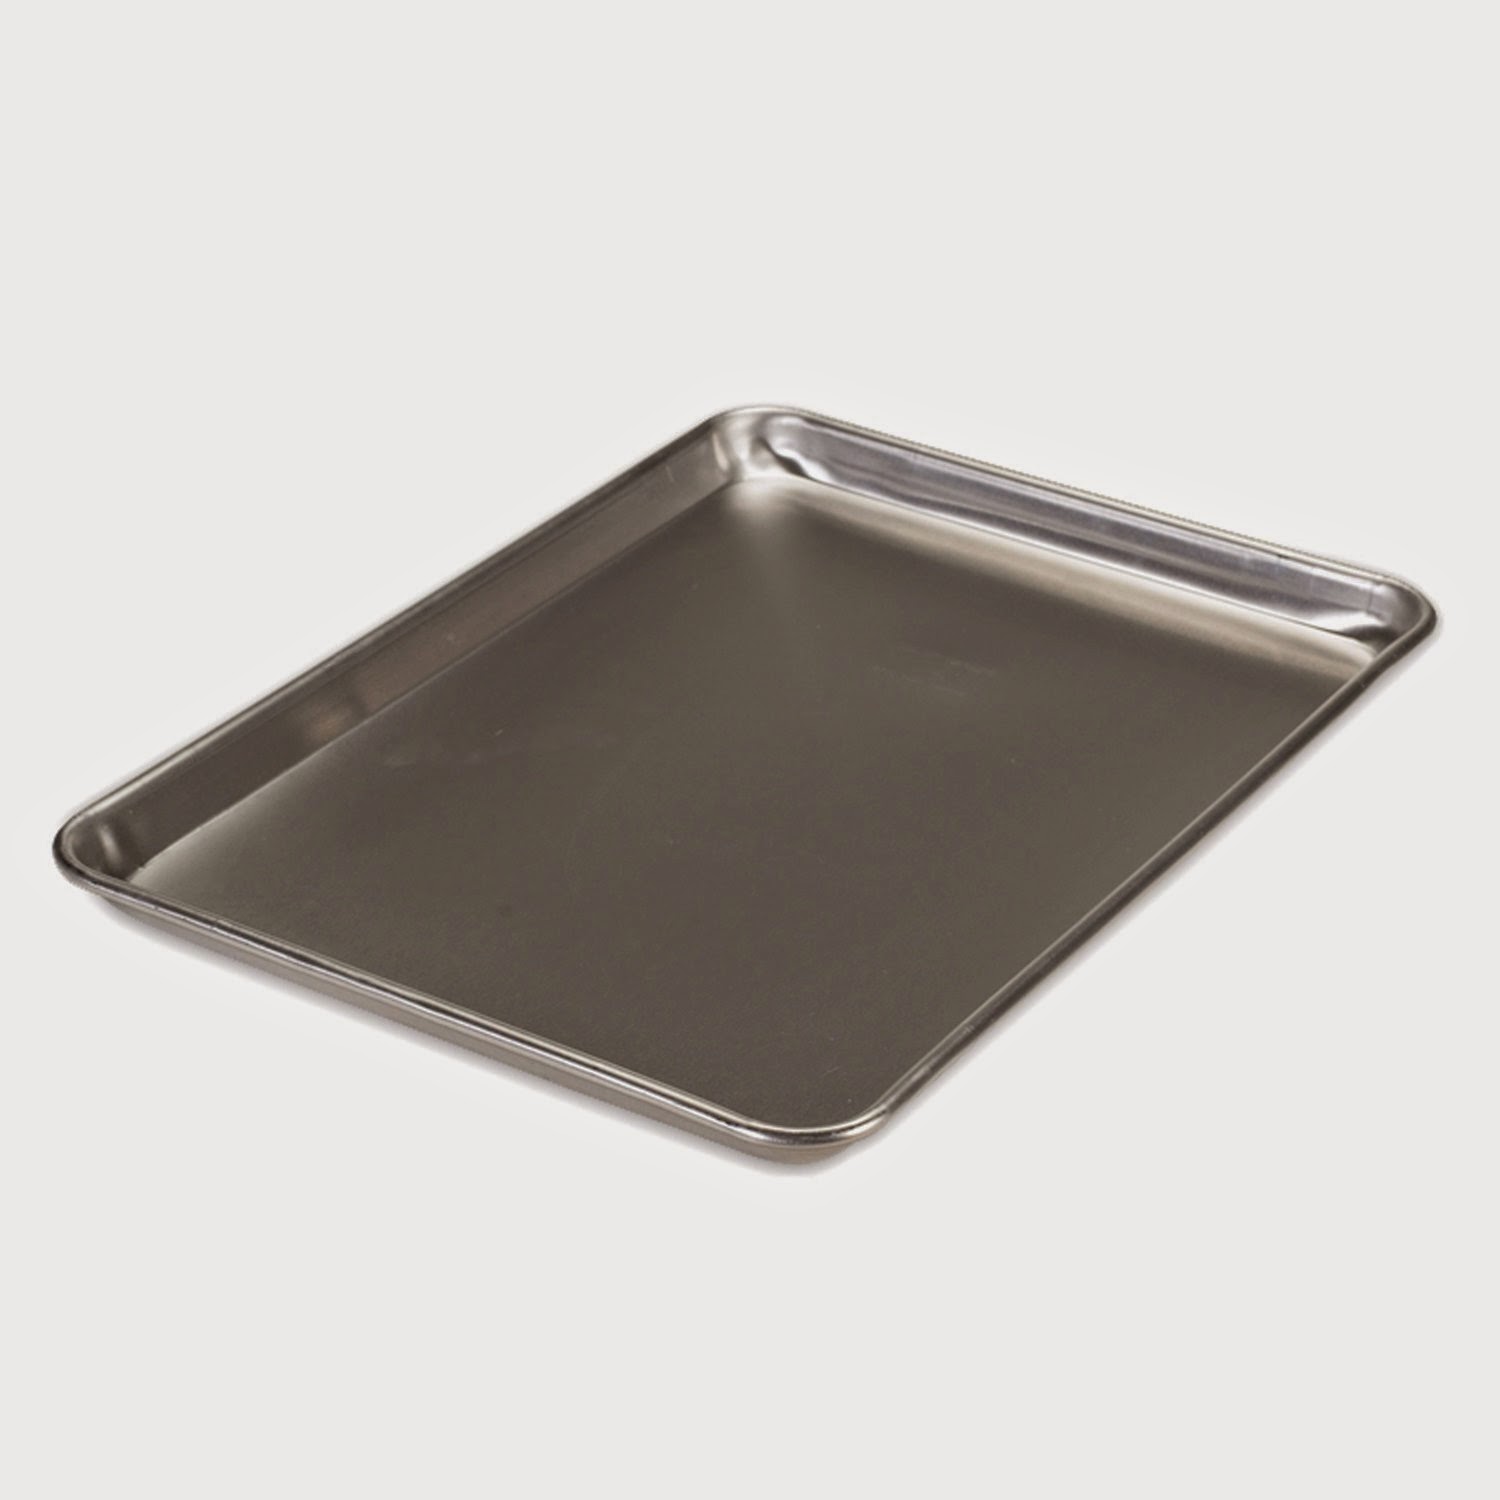
6. Rimmed Baking Sheet - I am guessing a lot of you already own a cookie sheet, but I am adding this one on just in case you don't. We use our quarter and half baking sheets several times a week. Pair this with the Silpat for roasting vegetables and meat, baking cookies, making granola and fruit leather, or dehydrating fruit. I got the Nordic Ware quarter sheet for Christmas last year, and it has held up so well that I have the half sheet on my wish list this year. It seriously looks the same as the day I got it - not even a hint of warping or staining.
My Pick: Nordic Ware Aluminum Commercial Baker's Half Sheet - currently $14.88
7. Salad Spinner - We use our salad spinner so frequently during the spring when we seem to get 5 different types of greens in our vegetable CSA each week. The salad spinner is so much more efficient than hand-washing and drying greens; with a salad spinner, you just put any type of greens in the basket, rinse them with water really well, put them in the spinner, and give them a spin. The best part - our daughters love using the salad spinner, so we can some prep work to them. *I'm cheating on my pick on this one a bit because we have the $40 OXO version, but I think we would be just as happy with a much cheaper, smaller version.
My Pick*: Prepworks Progressive International 2.5 Quart Salad Spinner - currently $12.70
8. Garlic Press - If you do not already have a garlic press, you seriously need one. Garlic presses are such a time saver; you can throw multiple unpeeled cloves of garlic in the press, squeeze, and have perfectly crushed garlic in seconds. Cleaning the garlic press is not such a breeze; however, my pick separates into two separate pieces, so the handle can be used to scrape the crushed garlic off and clean the leftovers out of the press. Genius!
My Pick: Joseph Joseph Easy Press Garlic Press with Integrated Scraping Tool - currently $18.86
9. Quality Measuring Spoons & Measuring Cups - Every home cook deserves a quality set of measuring tools that also includes a wide variety of measurements. I highly recommend investing in a stainless steel set of measuring cups and measuring spoons with etched numbers. While they may cost a bit more than the plastic set, you will not need to replace them in a few years when one melts or the numbers start to wear off. I personally have two sets of measuring spoons, so I do not have to constantly rinse spoons as I cook. I am linking to my favorite set of measuring spoons, which are long and narrow so they easily fit in most spice jars. It is so much more convenient to stick the spoon in the jar than to try to carefully pour spices into the spoon.
My Pick: RSVP Endurance Spice Measuring Spoon Set - currently $13.95
10. Immersion Blender - While this may not be a 'must-have' for everyone, I use my immersion blender a fair amount especially this time of year when I am making soups. Instead of transferring hot soup to a blender to get a smooth texture, I just use the immersion blender right in the Dutch oven. My sister uses hers to make smoothies (without any ice or frozen fruit) for her kids everyday. Our exact immersion blender has been discontinued, but my pick is an updated version with detachable heads for easy cleaning.
My Pick: Hamilton Beach 2-Speed Hand Blender - currently $19.99
Thursday, November 20, 2014
Creamy Spinach "Alfredo" Chicken Sausage
I have been thinking about making this all day. It's cold, and I want some creamy comfort food! Trying to accomplish creamy, and stick to real food can have it's challenges. But, I was on a mission, and I was determined to be successful!! And, I was! This turned out exactly how I pictured it would! It was pretty easy, and didn't take too long to make, even though I had several things cooking at one time. You could easily add more seasonings to the sauce, according to your tastes. I probably will next time, but this time I was focused on creaminess! (Is that a word?)
Yum, just yum!!!

Ingredients:
1 box (13.25 oz) cooked pasta of choice. I used 100% Whole Wheat
8 oz block of shredded white sharp cheddar
1 cup fresh or frozen spinach (I buy the bagged frozen so I can use as little as I want to)
1 tbsp minced garlic
1 tsp garlic powder
3 tsp tapioca powder/flour (you can sub corn starch or arrowroot powder)
1 1/4 cup plus 3 tsp milk of choice (I used unsweetened almond milk)
1 tbsp olive oil
salt and pepper to taste
1 package of Bilinski's Organic Spinach & Feta Chicken Sausage** (or sub meat of choice)
For the Meat:
Just heat and slice! I heated in a skillet while everything else was cooking.
For the Pasta:
Boil as you normally would, then drain and place in a medium bowl that you can add the rest of the ingredients to as they get done.
For the Spinach:
While you have your pasta boiling, heat the olive oil in a skillet then add the minced garlic. When it is just starting to look toasted, add your spinach and saute until it is done. Add to the cooked pasta.
For the sauce:
Combine the 1 1/4 cup milk, garlic powder, salt and pepper in a small saucepan on low heat. While that is heating, have your shredded cheese close by. In a small bowl combine the 3 tsp milk and tapioca flour and mix until all the lumps are out and it forms a paste.
When your milk is heated, slowly add the cheese, stirring constantly to help it to melt and to keep it from sticking to the bottom of the pan. Once you have all the cheese melted, add the tapioca paste and continue to stir over the heat until you reach a creamy consistency. This should only take a few short minutes. If you do not think it is thick enough, you can make another paste 1 tsp at a time, equal parts tapioca powder and milk.
Once you get the creamy texture you are looking for, pour it over your cooked pasta and spinach.
Add the meat, and stir.
That's it, you are ready to eat it up!
**Here is the Sausage I found at our local Harris Teeter. For a sausage, it has a pretty minimal ingredient list. It also tastes fantastic!!


Wednesday, November 19, 2014
Chipotle Black Bean & Sweet Potato Vegetarian Stew
I put this recipe together the other night while trying to figure out something to do with the dozens of sweet potatoes we keep getting from our vegetable CSA. I think my whole family is a little burned out on chili, so I decided to skip the meat and serve this one-pot meal over rice.
You could easily add chicken, ground beef, or andouille to this one to change up the flavor. If you do, just brown it, cut it up, and mix it in when you add the chicken stock.

You could easily add chicken, ground beef, or andouille to this one to change up the flavor. If you do, just brown it, cut it up, and mix it in when you add the chicken stock.
Chipotle Black Bean & Sweet Potato Vegetarian Stew
Ingredients:
1 tbsp olive oil
2 large sweet potatoes, cubed
3 medium carrots, chopped
¼ - ½ red onion, chopped
2 cloves of garlic, minced
2 cans black beans, drained & rinsed
1 can diced tomatoes, drained
1 chipotle in adobo, finely chopped (add a tbsp of the adobo sauce for smokier flavor)
1 tsp chili powder
1 ½ tsp ground cumin
2 tsp dried parsley
salt & pepper to taste
1 cup vegetable stock (or any stock for non-vegetarian)
sour cream (omit for vegan) & prepared rice for serving
1 tbsp olive oil
2 large sweet potatoes, cubed
3 medium carrots, chopped
¼ - ½ red onion, chopped
2 cloves of garlic, minced
2 cans black beans, drained & rinsed
1 can diced tomatoes, drained
1 chipotle in adobo, finely chopped (add a tbsp of the adobo sauce for smokier flavor)
1 tsp chili powder
1 ½ tsp ground cumin
2 tsp dried parsley
salt & pepper to taste
1 cup vegetable stock (or any stock for non-vegetarian)
sour cream (omit for vegan) & prepared rice for serving
Instructions:
In Dutch oven, heat oil over medium heat. Once oil is heated, add cubed sweet potatoes, chopped carrots, and red onion. Cook, stirring occasionally, for about 8-10 minutes, or until vegetables are slightly softened. Add minced garlic, and continue cooking, stirring continuously, for 30 seconds – 1 minute. Add rest of ingredients through salt & pepper, stirring to combine. Add stock, bring to a boil, and then reduce to a simmer. Continue simmering for 20 minutes, or until vegetables are completely softened and liquid has reduced. Serve over prepared rice, and top with a dollop of sour cream or plain yogurt.
In Dutch oven, heat oil over medium heat. Once oil is heated, add cubed sweet potatoes, chopped carrots, and red onion. Cook, stirring occasionally, for about 8-10 minutes, or until vegetables are slightly softened. Add minced garlic, and continue cooking, stirring continuously, for 30 seconds – 1 minute. Add rest of ingredients through salt & pepper, stirring to combine. Add stock, bring to a boil, and then reduce to a simmer. Continue simmering for 20 minutes, or until vegetables are completely softened and liquid has reduced. Serve over prepared rice, and top with a dollop of sour cream or plain yogurt.
Friday, November 14, 2014
Easy Raw Almond Butter
Do you know how much raw almond butter costs? Seriously, that stuff is pricey! Last time I looked at whole foods it was $17 for a 16 oz jar. Say what!? I was so excited to see they had it, but my excitement quickly diminished when I saw the price tag! So, my $5.99 bag of raw almonds from Trader Joe's is getting some good use. I have made this about 5 or 6 times now, and finally learned the secret to making it a little quicker, and with my Ninja food processor.
All you need is a decent food processor, raw almonds, a little coconut oil or additions you want (salt, honey, maple syrup, coconut sugar, etc).
I'm sure you can use this same process with any nut, and get the same result, but so far I have only tried almonds.

16 oz raw almonds
1 tsp salt (more or less to taste, or you can omit)
Optional mix ins (Coconut oil, chocolate)
1) Put your almonds in the food processor and start it up. (Warning, it is going to be loud when you first start it up, but once they break up a little it won't be so bad. I have to warn my kids ahead of time though, so they can cover their ears!!)
2)My Ninja processor is the pulse one, so I let it run for about 30 seconds, then stop to see if I need to stir it up since they seem to stick the the edge the more it processes. I do this on and off for about 6-7 minutes.
3) Once it starts sticking together a little, you want to add any add ins, like salt, coconut oil, chocolate, etc. (see picture below of how it looks when it's starting to stick.)

4) blend again until it is mixed in well, and you have a nice nut butter consistency. The longer you blend it, the creamier it will be. I like it with a little bit of a gritty texture.
5) You're done! See how easy that was?!
I store it in my fridge, and scoop out what I need. It will harden a little when cold, but 30 seconds in the microwave is all you need to soften it back up! This lasts about a week or two, and then it's gone. I love it for my morning and afternoon snack with apple slices! Best stuff ever!
1) Put your almonds in the food processor and start it up. (Warning, it is going to be loud when you first start it up, but once they break up a little it won't be so bad. I have to warn my kids ahead of time though, so they can cover their ears!!)
2)My Ninja processor is the pulse one, so I let it run for about 30 seconds, then stop to see if I need to stir it up since they seem to stick the the edge the more it processes. I do this on and off for about 6-7 minutes.
3) Once it starts sticking together a little, you want to add any add ins, like salt, coconut oil, chocolate, etc. (see picture below of how it looks when it's starting to stick.)
4) blend again until it is mixed in well, and you have a nice nut butter consistency. The longer you blend it, the creamier it will be. I like it with a little bit of a gritty texture.
5) You're done! See how easy that was?!
I store it in my fridge, and scoop out what I need. It will harden a little when cold, but 30 seconds in the microwave is all you need to soften it back up! This lasts about a week or two, and then it's gone. I love it for my morning and afternoon snack with apple slices! Best stuff ever!
Thursday, November 13, 2014
Slow Cooker Cilantro Lime Chicken Taco Bowls
Time to redefine Taco Night! This dish is easy, and can cook while you work, making dinner prep a breeze!

Ingredients:
2 lbs boneless skinless thighs1 Can Rotel tomatoes 1 cup shredded zucchini (hidden veggies!!)***1 tablespoon chili powder
½ teaspoon garlic powder
¼ teaspoon onion powder
½ teaspoon dried oregano
½ teaspoon paprika
1½ teaspoons ground cumin
1 teaspoon sea salt
1 teaspoon black pepper
Lime Juice, squeezed from 2 limes
¼ teaspoon onion powder
½ teaspoon dried oregano
½ teaspoon paprika
1½ teaspoons ground cumin
1 teaspoon sea salt
1 teaspoon black pepper
Lime Juice, squeezed from 2 limes
8 oz shredded Monterey Jack cheese ( or white cheddar)
1/2 bunch cilantro
2 cups cooked quinoa (1 cup dry + 2 cups water or broth)
Place chicken in slow cooker (I throw it in frozen) and top with Rotel, seasonings, and lime juice.
Cook on low for 8 hours or high for 4 hours. About an hour before serving, add the cilantro and zucchini and shred the chicken with a fork to mix it all well.
Prepare your quinoa, and shred the cheese. Serve with quinoa at the bottom, top with chicken, then top with cheese! Enjoy!!
*** You could always add corn or black beans, too! We don't eat either due to food allergies, but they would be a great addition if you like them!
adapted from: http://www.budgetbytes.com/2011/07/taco-chicken-bowls/
Tuesday, November 4, 2014
Slow Cooker Sweet Potato Chili- kid friendly!
It is Chili season in North Carolina! Cooler temps mean it's time to break out the Crock Pot and let it do all the work for me. I love chili this time of year!
My 3 year old has a bean/pea allergy so we avoid all legumes and lentils. I came across a recipe for sweet potato chili last year, and tried it, but omitted the beans the recipe called for. I've made it several times since then, tweaking the recipe a little each time. I finally got the perfect chili that we will all eat.
Try it, you will not be disappointed! The sweet potato is the perfect bean replacement, but still gives you a similar texture. I actually double this recipe in my large Crock Pot so I have extra for the freezer. --C

Ingredients:
1 lb of ground (beef, venison, turkey, chicken)
2-3 sweet potato, peeled and diced into cubes
1- 15oz can of organic diced tomatoes
1- 8oz can organic tomato sauce
1 Homemade Chili seasoning recipe (below)
Chili Seasoning*:
1 TBSP Chili Powder
1.5 TBSP minced onion
1 tsp cumin
1 tsp salt
¼ tsp garlic powder
¼ tsp ground pepper
Instructions:
Line your slow cooker with a liner to reduce clean up, if
desired. (Totally worth the money to get these!)
Put meat in bottom of cooker (I put it in frozen, no need to
thaw ahead of time!)
Top meat with seasoning, tomato sauce, diced tomatoes, and
diced sweet potatoes. Cook on low for 6-8 hours.
About an hour before eating,
take a spoon and mix everything well, making sure to crumble the meat.
**I don’t add cayenne pepper to my chili seasoning, because
my hubby and kids don’t like spicy foods. If you do want it spicy, add ¼ tsp
cayenne, or more to taste. I usually
just sprinkle a little on the top of mine and then mix it up!
Subscribe to:
Posts (Atom)