Sunday, December 21, 2014

Grain Free Cauliflower Pizza Casserole!

I came across a pin of a healthy "Pizza Casserole" on Pinterest,  but could never find an actual recipe for it. (Isn't that the most annoying thing ever? Why pin it if you're not going to tell us how to make it??) Ok, rant over... It looked like it wasn't that difficult, so I threw this together for supper tonight, and was very pleased with the simplicity of it. The best part is that my boys are eating their veggies, without even realizing it!
--C


Ingredients:
4 cups cooked cauliflower, cut into bite size pieces.
1 cup freshly shredded mozzarella cheese
1 cup of your favorite marinara or pizza sauce
Toppings of choice. I used Boars Head Pepperoni

Preheat oven to 350 degrees.
In a bowl mix the cooked cauliflower, marinara and 1/2 cup of the shredded cheese.
Pour into a 2.8 liter (3 quart) casserole dish.
Top with remaining cheese and any additional toppings.
Bake uncovered for approximately 20-25 minutes, until cheese is melted and bubbly.


Saturday, November 22, 2014

10 Stocking Stuffers & Gift Ideas for a Real Food Kitchen for Under $20

I'll be the first to admit that I have A LOT of kitchen gadgets, some of which I never use. However, now that we are doing so much cooking at home - much of which requires additional prep, like shredding our own cheese - I use a lot of the gadgets that used to sit idle.

Since Christmas is just around the corner, closely followed by New Year's resolutions, I thought I would put together a list of my top 10 kitchen gadgets for under $20. Tell me what you would add to the list in the comments section. 

My 10 Favorite Kitchen Gadgets for Under $20

1. Box Grater - We no longer buy shredded cheese, so our box grater gets a workout. I personally like the graters that also include a receptacle to catch the cheese as you shred. Bonus: box graters work great for shredding vegetables, too. 
My PickOXO Good Grips Box Grater - currently $17.95

2. "Y" Vegetable Peeler - Long before we committed to eating "real" food at home, we ate a lot of vegetables. Before we discovered the "Y" style vegetable peeler my husband always opted for a knife to peel fruit and veggies. However, the Zyliss Y peeler was a game changer for us - it's so effective and efficient that I peel raw acorn and butternut squash with it. 
My Pick: Zyliss Vegetable Peeler - currently $9.99

3. Apple Corer - This is one of the tools I've had for a couple of years now that I rarely used until we made the switch to clean eating. Now I use this frequently to make pear and apple chips in our dehydrator, as well as to make peanut butter apple sandwiches for the girls' lunches. 
My Pick: OXO Good Grips Corer - currently $8.95

4. Biscuit Cutter - This is another tool we have had sitting around for awhile, but we have only recently started using much. Homemade whole wheat biscuits have become a common fixture in our house, and thanks to this set of biscuit cutters we get a perfect size and shape each time. The smallest also works great for cutting crackers. 
My Pick: RSVP Endurance Stainless Biscuit Cutters - currently $9.95

5. Silicone Baking Mat - We basically use our silicone baking mats every time we bake or roast anything. They are a great replacement for cooking spray and make cleanup a breeze. Now I can confidently ignore the directions to 'prepare' the pan with butter or cooking spray. We have both the 1/4 sheet size and the 1/2 sheet size, and I am seriously contemplating getting a second 1/2 sheet size just to have an extra because we use it that much. 
My Pick: Silpat Non-Stick Silicone Baking Mat (Half Sheet) - currently $13.89 

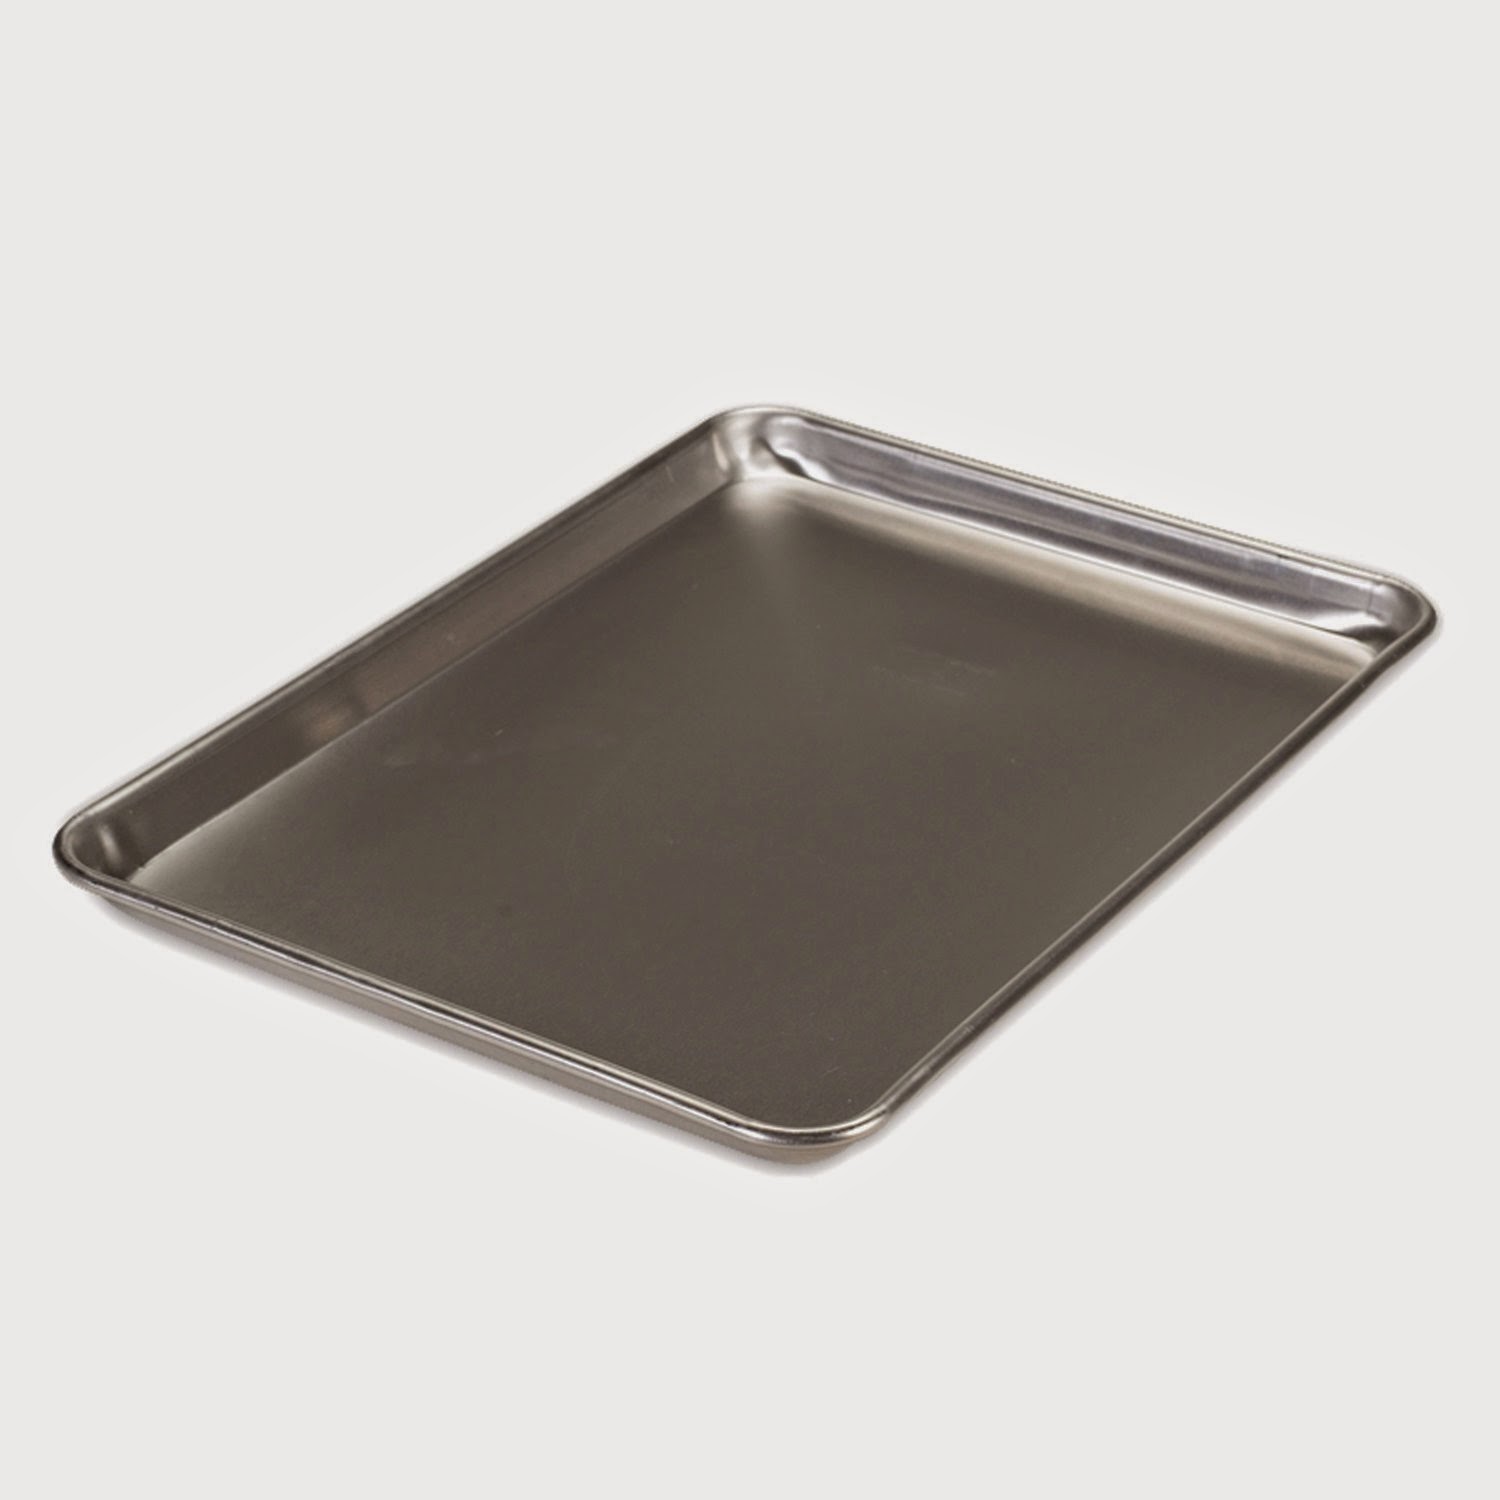
6. Rimmed Baking Sheet - I am guessing a lot of you already own a cookie sheet, but I am adding this one on just in case you don't. We use our quarter and half baking sheets several times a week. Pair this with the Silpat for roasting vegetables and meat, baking cookies, making granola and fruit leather, or dehydrating fruit. I got the Nordic Ware quarter sheet for Christmas last year, and it has held up so well that I have the half sheet on my wish list this year. It seriously looks the same as the day I got it - not even a hint of warping or staining. 

7. Salad Spinner - We use our salad spinner so frequently during the spring when we seem to get 5 different types of greens in our vegetable CSA each week. The salad spinner is so much more efficient than hand-washing and drying greens; with a salad spinner, you just put any type of greens in the basket, rinse them with water really well, put them in the spinner, and give them a spin. The best part - our daughters love using the salad spinner, so we can some prep work to them. *I'm cheating on my pick on this one a bit because we have the $40 OXO version, but I think we would be just as happy with a much cheaper, smaller version. 

8. Garlic Press - If you do not already have a garlic press, you seriously need one. Garlic presses are such a time saver; you can throw multiple unpeeled cloves of garlic in the press, squeeze, and have perfectly crushed garlic in seconds. Cleaning the garlic press is not such a breeze; however, my pick separates into two separate pieces, so the handle can be used to scrape the crushed garlic off and clean the leftovers out of the press. Genius! 

9. Quality Measuring Spoons & Measuring Cups - Every home cook deserves a quality set of measuring tools that also includes a wide variety of measurements. I highly recommend investing in a stainless steel set of measuring cups and measuring spoons with etched numbers. While they may cost a bit more than the plastic set, you will not need to replace them in a few years when one melts or the numbers start to wear off. I personally have two sets of measuring spoons, so I do not have to constantly rinse spoons as I cook. I am linking to my favorite set of measuring spoons, which are long and narrow so they easily fit in most spice jars. It is so much more convenient to stick the spoon in the jar than to try to carefully pour spices into the spoon. 
My Pick: RSVP Endurance Spice Measuring Spoon Set - currently $13.95 

10. Immersion Blender - While this may not be a 'must-have' for everyone, I use my immersion blender a fair amount especially this time of year when I am making soups. Instead of transferring hot soup to a blender to get a smooth texture, I just use the immersion blender right in the Dutch oven. My sister uses hers to make smoothies (without any ice or frozen fruit) for her kids everyday. Our exact immersion blender has been discontinued, but my pick is an updated version with detachable heads for easy cleaning. 
My Pick: Hamilton Beach 2-Speed Hand Blender - currently $19.99 

Thursday, November 20, 2014

Creamy Spinach "Alfredo" Chicken Sausage


I have been thinking about making this all day. It's cold, and I want some creamy comfort food! Trying to accomplish creamy, and stick to real food can have it's challenges. But, I was on a mission, and I was determined to be successful!! And, I was! This turned out exactly how I pictured it would! It was pretty easy, and didn't take too long to make, even though I had several things cooking at one time. You could easily add more seasonings to the sauce, according to your tastes. I probably will next time, but this time I was focused on creaminess! (Is that a word?)
Yum, just yum!!!


Ingredients:

1 box (13.25 oz) cooked pasta of choice. I used 100% Whole Wheat
8 oz block of shredded white sharp cheddar
1 cup fresh or frozen spinach (I buy the bagged frozen so I can use as little as I want to)
1 tbsp minced garlic
1 tsp garlic powder
3 tsp tapioca powder/flour (you can sub corn starch or arrowroot powder)
1 1/4 cup plus 3 tsp milk of choice (I used unsweetened almond milk)
1 tbsp olive oil
salt and pepper to taste
1 package of Bilinski's Organic Spinach & Feta Chicken Sausage** (or sub meat of choice)


For the Meat:
Just heat and slice! I heated in a skillet while everything else was cooking.
For the Pasta: 
Boil as you normally would, then drain and place in a medium bowl that you can add the rest of the ingredients to as they get done.
For the Spinach:
While you have your pasta boiling, heat the olive oil in a skillet then add the minced garlic. When it is just starting to look toasted, add your spinach and saute until it is done. Add to the cooked pasta.
For the sauce:
Combine the 1 1/4 cup milk, garlic powder, salt and pepper in a small saucepan on low heat. While that is heating, have your shredded cheese close by. In a small bowl combine the 3 tsp milk and tapioca flour and mix until all the lumps are out and it forms a paste.
When your milk is heated, slowly add the cheese, stirring constantly to help it to melt and to keep it from sticking to the bottom of the pan. Once you have all the cheese melted, add the tapioca paste and continue to stir over the heat until you reach a creamy consistency. This should only take a few short minutes. If you do not think it is thick enough, you can make another paste 1 tsp at a time, equal parts tapioca powder and milk.
Once you get the creamy texture you are looking for, pour it over your cooked pasta and spinach.
Add the meat, and stir.
That's it, you are ready to eat it up!

**Here is the Sausage I found at our local Harris Teeter. For a sausage, it has a pretty minimal ingredient list. It also tastes fantastic!!


Wednesday, November 19, 2014

Chipotle Black Bean & Sweet Potato Vegetarian Stew

I put this recipe together the other night while trying to figure out something to do with the dozens of sweet potatoes we keep getting from our vegetable CSA. I think my whole family is a little burned out on chili, so I decided to skip the meat and serve this one-pot meal over rice. 

You could easily add chicken, ground beef, or andouille to this one to change up the flavor. If you do, just brown it, cut it up, and mix it in when you add the chicken stock.

Chipotle Black Bean & Sweet Potato Vegetarian Stew

Ingredients:
1 tbsp olive oil
2 large sweet potatoes, cubed
3 medium carrots, chopped
¼ - ½ red onion, chopped
2 cloves of garlic, minced
2 cans black beans, drained & rinsed
1 can diced tomatoes, drained
1 chipotle in adobo, finely chopped (add a tbsp of the adobo sauce for smokier flavor)
1 tsp chili powder
1 ½ tsp ground cumin
2 tsp dried parsley
salt & pepper to taste
1 cup vegetable stock (or any stock for non-vegetarian)
sour cream (omit for vegan) & prepared rice for serving 

Instructions:
In Dutch oven, heat oil over medium heat. Once oil is heated, add cubed sweet potatoes, chopped carrots, and red onion. Cook, stirring occasionally, for about 8-10 minutes, or until vegetables are slightly softened. Add minced garlic, and continue cooking, stirring continuously, for 30 seconds – 1 minute. Add rest of ingredients through salt & pepper, stirring to combine. Add stock, bring to a boil, and then reduce to a simmer. Continue simmering for 20 minutes, or until vegetables are completely softened and liquid has reduced. Serve over prepared rice, and top with a dollop of sour cream or plain yogurt. 

Friday, November 14, 2014

Easy Raw Almond Butter

Do you know how much raw almond butter costs? Seriously, that stuff is pricey! Last time I looked at whole foods it was $17 for a 16 oz jar. Say what!? I was so excited to see they had it, but my excitement quickly diminished when I saw the price tag! So, my $5.99 bag of raw almonds from Trader Joe's is getting some good use. I have made this about 5 or 6 times now, and finally learned the secret to making it a little quicker, and with my Ninja food processor.
All you need is a decent food processor, raw almonds, a little coconut oil or additions you want (salt, honey, maple syrup, coconut sugar, etc).
 I'm sure you can use this same process with any nut, and get the same result, but so far I have only tried almonds.


Ingredients:
16 oz raw almonds
1 tsp salt (more or less to taste, or you can omit)
Optional mix ins (Coconut oil, chocolate)

1) Put your almonds in the food processor and start it up. (Warning, it is going to be loud when you first start it up, but once they break up a little it won't be so bad. I have to warn my kids ahead of time though, so they can cover their ears!!)
2)My Ninja processor is the pulse one, so I let it run for about 30 seconds, then stop to see if I need to stir it up since they seem to stick the the edge the more it processes. I do this on and off for about 6-7 minutes.
3) Once it starts sticking together a little, you want to add any add ins, like salt, coconut oil, chocolate, etc. (see picture below of how it looks when it's starting to stick.)

4) blend again until it is mixed in well, and you have a nice nut butter consistency. The longer you blend it, the creamier it will be. I like it with a little bit of a gritty texture.
5) You're done! See how easy that was?!

I store it in my fridge, and scoop out what I need. It will harden a little when cold, but 30 seconds in the microwave is all you need to soften it back up! This lasts about a week or two, and then it's gone. I love it for my morning and afternoon snack with apple slices! Best stuff ever!


Thursday, November 13, 2014

Slow Cooker Cilantro Lime Chicken Taco Bowls


Time to redefine Taco Night! This dish is easy, and can cook while you work, making dinner prep a breeze! 


Ingredients:
2 lbs boneless skinless thighs1 Can Rotel tomatoes 1 cup shredded zucchini (hidden veggies!!)***1 tablespoon chili powder
½ teaspoon garlic powder
¼ teaspoon onion powder
½ teaspoon dried oregano
½ teaspoon paprika
1½ teaspoons ground cumin
1 teaspoon sea salt
1 teaspoon black pepper
Lime Juice, squeezed from 2 limes
8 oz shredded Monterey Jack cheese ( or white cheddar)
1/2 bunch cilantro
2 cups cooked quinoa (1 cup dry + 2 cups water or broth)

Place chicken in slow cooker (I throw it in frozen) and top with Rotel, seasonings, and lime juice. 
Cook on low for 8 hours or high for 4 hours. About an hour before serving, add the cilantro and zucchini and shred the chicken with a fork to mix it all well. 
Prepare your quinoa, and shred the cheese. Serve with quinoa at the bottom, top with chicken, then top with cheese! Enjoy!! 

*** You could always add corn or black beans, too! We don't eat either due to food allergies, but they would be a great addition if you like them!  


adapted from: http://www.budgetbytes.com/2011/07/taco-chicken-bowls/

Tuesday, November 4, 2014

Slow Cooker Sweet Potato Chili- kid friendly!

It is Chili season in North Carolina! Cooler temps mean it's time to break out the Crock Pot and let it do all the work for me. I love chili this time of year!
My 3 year old has a bean/pea allergy so we avoid all legumes and lentils. I came across a recipe for sweet potato chili last year, and tried it, but omitted the beans the recipe called for. I've made it several times since then, tweaking the recipe a little each time. I finally got the perfect chili that we will all eat. 
Try it, you will not be disappointed! The sweet potato is the perfect bean replacement, but still gives you a similar texture. I actually double this recipe in my large Crock Pot so I have extra for the freezer.  --C


Ingredients:
1 lb of ground (beef, venison, turkey, chicken)
2-3 sweet potato, peeled and diced into cubes
1- 15oz can of organic diced tomatoes
1- 8oz can organic tomato sauce
1 Homemade Chili seasoning recipe (below)

Chili Seasoning*:
1 TBSP Chili Powder
1.5  TBSP minced onion
1 tsp cumin
1 tsp salt
¼ tsp garlic powder
¼ tsp ground pepper

Instructions:
Line your slow cooker with a liner to reduce clean up, if desired. (Totally worth the money to get these!)
Put meat in bottom of cooker (I put it in frozen, no need to thaw ahead of time!)
Top meat with seasoning, tomato sauce, diced tomatoes, and diced sweet potatoes. Cook on low for 6-8 hours. 
About an hour before eating, take a spoon and mix everything well, making sure to crumble the meat.

**I don’t add cayenne pepper to my chili seasoning, because my hubby and kids don’t like spicy foods. If you do want it spicy, add ¼ tsp cayenne, or more to taste.  I usually just sprinkle a little on the top of mine and then mix it up!


Monday, November 3, 2014

100 Days of Real Food and Against All Grain COOKBOOK GIVEAWAY!!!

We're doing a cookbook over on our Facebook page! Head over to Confessions of A Real Food Mom's Facebook page to enter. 

Need a little help getting back into a healthy eating routine after overindulging on a little too much Halloween candy and before the chaos of the holidays? Then head over to Confessions of a Real Food Mom's Facebook page to enter this cookbook giveaway, and check our blog regularly for easy, family-friendly, healthy recipe ideas. 


**This giveaway is in no way sponsored by Facebook, Blogger, Against All Grain, or 100 Days of Real Food. 

Friday, October 31, 2014

Sweet Potato & Ground Bison Sloppy Joes Recipe

Sloppy Joes are such an easy, quick, and kid-friendly weeknight dinner. While I always have these great aspirations to try something new with ground meat, 9 out of 10 times I come back to Sloppy Joes. ... and why wouldn't I? I know that they are nearly impossible to screw up even when left unattended for 15 minutes while I change a diaper or break up a fight, and  I know my kids will actually eat them, which is most often not the case for dinner at our house these days. 

I like to change them up by adding different root veggies or beans to the mixture. Not only does it add a little fiber and another veg to their plates, it also stretches the meat a little further. 

We currently have a whole bunch of sweet potatoes from our CSA farm share (read about what a CSA is here), so I took some inspiration from a Martha Stewart recipe and 100 Days of Real Food recipe to come up with this fantastic new Sloppy Joe recipe. This is my first time making "Real Food" rules approved Sloppy Joes and I will definitely be using this recipe from now on. 

Note: We like our Sloppy Joes to have a smoky flavor with a hint of heat; if you prefer a sweeter mix, you'll want to cut the amount of chili powder and cumin used. 


Ingredients

1 tablespoon olive oil
1 medium sweet potato, chopped
2 shallots, finely chopped (OR ½ small onion & 1 clove garlic, finely chopped)
1 pound ground bison (or any ground meat)
1 14.5 oz. can tomato sauce (no sugar added)
1 tablespoon honey
1½ teaspoons chili powder
1½ teaspoons cumin
Dash of cinnamon
salt & pepper

Directions

In a large skillet, heat oil over medium heat. Add sweet potato, cook for about 3 minutes. Add shallot, and continue cooking until both sweet potato and shallot soften, 2-3 minutes.

Add ground meat to skillet and brown until no pink visible, breaking up meat with wooden spoon while it cooks. Season with salt & pepper.

Meanwhile, in a separate bowl, whisk together tomato sauce, honey, chili powder, cumin, and cinnamon. 

Add sauce to browned meat and bring to a boil. Reduce heat to low, simmer for   5-10 minutes until most liquid has evaporated and mixture has thickened. 

Serve Sloppy Joes on whole wheat buns. 


*Adapted from 100 Days of Real Food Turkey Sloppy Joes & Martha Stewart's Turkey Sloppy Joes.*

Healthier Pumpkin Rice Krispy Treats

Our Halloween plans were changed last minute, so I had to try to figure out something for us to do this evening. We decided on a movie and treat, so I went to the store in search of something easy to throw together. My small town has limited health food stores, but we do have one grocery with a very small health foods isle. So, I picked up some organic brown rice crispy cereal and decided to make some version of pumpkin "rice krispy treats". I was not in luck with limited ingredient marshmallows, so ended up with the store brand. I need to check and see what Whole Foods has next time I am there.


(Side note: This cereal brand is allergen friendly, which was a great bonus!)


Now, keep in mind that I'm not very crafty, so it's ok to laugh at my finished pumpkin. ;) But, the important thing is that these tasted great and my kids loved them!


Ingredients:
6 cups of brown rice crisp cereal
4 cups of marshmallows
2 tbsp of coconut oil
1/8 to 1/4 cup pumpkin
1 tsp of pumpkin spice seasoning, (or just add to taste if you prefer)
A few chocolate chips for decorating (optional)

Directions:
Put the coconut oil in a large pan on low heat. Once it has turned to liquid, add marshmallows and stir. When marshmallows have melted, stir in pumpkin. Too much pumpkin will make them not as crispy, so somewhere between 1/8 and 1/4 cup works great. Also add seasoning.
Remove from Heat.
Add your rice cereal and stir well, making sure you get everything from the bottom stirred in.
Pour the mixture into a 9x13 and flatten with a spoon, making sure it's pressed into all the corners.
Once they are cooled they are ready to eat!


I ended up putting them in the fridge to get them good and cool. Then I used a small cup to cut out a couple of circles to make the boys each a pumpkin. Then we decorated them with the chocolate chips.  Well, they mostly ate the chocolate chips, but it was fun and the treats tasted great!! --C


Thursday, October 30, 2014

Whole Wheat Pizza Crust Recipe

We love making pizza in our house. Until we switched to real food we always started our homemade pizza with Trader Joe's pizza dough. Unfortunately, the Trader Joe's crust uses all-purpose flour for the base, which means we don't buy it anymore. We've tried Trader Joe's whole wheat dough, but we were underwhelmed. In the end, my very talented husband came up with his own very simple whole wheat dough recipe.

Note: This recipe makes a thicker, chewier dough - like hand-tossed thickness - if you want thinner, crunchier crust cut the flour by 3-4 oz or ½ - ¾ of a cup.

Whole Wheat Pizza Dough

Ingredients
26 oz (~5 cups) whole wheat flour (we use King Arthur's white whole wheat) 
1 packet active dry yeast
1¾ tsp salt
2-3 Tbsp olive oil
2 tsp honey
1¾-2 cups WARM water

Directions
Using stand mixer bowl, whisk together flour, active dry yeast, and salt. (Note: you can 'proof' yeast by soaking it in the warm water, but this step is unnecessary unless the yeast is old and you are afraid it will no longer work.) Using the stand mixer with the dough hook at a medium speed, slowly add water, olive oil, and honey. Continue mixing for 5-10 minutes at a medium speed until dough is well kneaded. 

Remove mixing bowl from mixer, cover bowl with dishcloth, and let it rise on the counter for ~30 minutes. Separate dough into two equal sized balls. The dough is now ready to use, refrigerate, or freeze. Bake at 450 degrees for 15-20 minutes. 

If refrigerating, store in airtight container for up to 16 hours. Remove from refrigerator ~30 minutes before using to bring to room temperature. If freezing, wrap tightly in plastic wrap and freeze. Remove 4-5 hours before using, or thaw in refrigerator overnight. 


Tuesday, October 28, 2014

Whole Wheat Banana Carrot Muffins Recipe

We're attending a Halloween party tomorrow, which presents a challenge when trying to avoid refined sugar and white flour. Since I knew there would be plenty of not so healthy sugary options available to the kids, I wanted to make something that followed the real food rules. Of course, I immediately turned to the Days of Real Food website to find some inspiration. In the end, I decided to adapt 100 Days of Real Food's Whole-Wheat Carrot Applesauce Muffins to make Whole Wheat Banana Carrot Muffins. To make them a little more festive, I'm using Halloween themed cupcake liners. 


Ingredients
1½ cups whole wheat flour (I use King Arthur's white whole wheat)
1 teaspoon baking soda
1 teaspoon ground cinnamon
½ teaspoon nutmeg
½ teaspoon salt
½ cup butter, softened
¼ cup honey
1 egg 
1 teaspoon vanilla extract
very ripe bananas 
¾ cup shredded carrot (about 1 large) 

Directions
Preheat oven to 350 degrees. Prepare a muffin tin by spraying each of the muffin cavities or using paper liners.

Mash bananas with fork until smooth and runny. Set aside.

Whisk together dry ingredients (flour, baking soda, cinnamon, nutmeg, & salt) in medium mixing bowl. Using a mixer, combine together butter, honey, egg, and vanilla extract on a medium-high speed until butter is well broken up.

Turn the mixer down to a low speed and slowly add in the dry ingredients. Continue mixing until ingredients are just combined. Next, add the mashed banana and shredded carrot to the mixture and fold in on the lowest mixer speed or by hand with a spatula.

Divide the mixture evenly among each of the 12 (or 24 if mini) muffin cavities. Place the tin on the middle shelf. Bake for 18-21 minutes; if using mini-muffin tin, start checking for doneness around 11 minutes. When done, toothpick inserted into the middle of muffin should be mostly clean with a few crumbs. 


Cranberry Pumpkin Energy Bites Recipe

Am I the only one that struggles to find a use for leftover canned pumpkin? It seems that I rarely pick recipes that use a whole can of pumpkin, so I always end up with some leftovers. Today I used the leftover canned pumpkin to make Cranberry Pumpkin Energy Bites. This is a super simple recipe that does not require you to cook or bake anything.


Cranberry Pumpkin Energy Bites

Ingredients
1/4 cup pecans
1 cup old-fashioned rolled oats
1 cup canned pumpkin
1/4 cup dried cranberries
10 Medjool dates
2 Tablespoons chia seeds
1 1/2 teaspoons ground cinnamon
1/8 teaspoon nutmeg
1 teaspoon honey (optional; omit to make vegan)

Instructions
Add pecans to food processor and pulse until coarsely chopped. Add the rest of the ingredients to pecans in food processor and combine until desired consistency - it should start to form a giant ball. Let mixture firm up for 5-10 minutes, and then roll into 1" balls. Store in airtight container in the refrigerator. 

Makes approximately 15. 

Adapted from My Whole Food Life's Pumpkin Pie Energy Bites 

If you are still reading, note the awesome built-in bowl scraper on my food processor. It is so nice to not have to open the food processor and scrape down the sides with a rubber scraper over and over. You can check out the Hamilton Beach food processor here. This one replaced our super nice KitchenAid that I rarely used because it was so heavy ... sadly, the KitchenAid came to its demise when I dropped it from an upper cabinet onto my head and then the floor. Yikes!

Sunday, October 26, 2014

Coconut Flour Pumpkin Muffins with Chocolate Chips!

I don't know about anyone else, but pumpkin is not just for fall at our house. I make these muffins year round for my boys, because they are their favorite! You can make these with or without chocolate chips! But as you have noticed, chocolate is in everything I make, if I have a say about it. 


4 eggs
1 cup coconut milk
1/2 cup cooked, mashed pumpkin or canned 
1/4 cup pure maple syrup 
1/2 cup coconut flour
1/2 teaspoon baking soda

1 tsp vanilla extract or 1 vanilla bean
1 teaspoon cinnamon
1/2 cup enjoy life chocolate chips (optional)

Mix together wet ingredients, then add dry ingredients. If you are using chocolate chips, save them for last. Fold them in and pour the batter into a lined muffin tin.
Your batter will be pretty soupy, but it is supposed to be that way! 

Bake at 350 for 30-35 minutes, or until toothpick inserted comes out clean. 
Enjoy!!
--C

Friday, October 24, 2014

Grain Free Chocolate Chip Cookies!!


Chocolate Chip Cookies- Grain free and Dairy Free

My oldest is coming home from college this weekend. He says he wants to trick or treat with his brothers on our camping trip, but I'm pretty sure it's because tomorrow is birthday. ;) So, his Nana is making his favorite cake, and the little kids and I made chocolate chip cookies since they are his favorite! These are perfect for satisfying that cookie craving, while following a real food, grain free lifestyle.


Ingredients
1 cup of almond flour
1 tbsp coconut flour
1 egg
1/4 cup melted coconut oil
1/4 cup raw honey
1 tsp vanilla extract or 1 vanilla bean 
1/4 tsp baking soda
Dash salt
1/2 cup of Enjoy Life chocolate chips

Instructions

Preheat oven to 350
Mix all dry ingredients- minus chocolate chips
Mix all wet ingredients
Combine the dry and wet ingredients and mix well. 
Fold in chocolate chips
Drop the cookies onto a lined baking sheet (I actually grabbed about a spoonful at a time, rolled into a ball, then put on the sheet. After I got them all placed, I flattened them out to the thickness I wanted.)
Bake for 8-12 minutes. For softer cookies, less time. For a crispier cookie, more time. 
Enjoy!! 

--C


Thursday, October 23, 2014

20 Minute Tomato Soup Recipe

Every year when the temperatures start to drop as summer turns to fall I get excited because I know "Soup Season" is upon us once more. Starting in mid-September there is rarely a week that goes by where I don't make soup or chili. This week is no exception.

A few days ago I found myself staring blankly into the refrigerator trying to figure out what to feed the kids for lunch, yet again. Since we've made the switch to minimally processed and unrefined food in our house, lunchtime seems to be a much bigger conundrum than it used to be. My kids used to eat PB&J 5 days/week, and while I still feed them PB&J regularly it's not as mindless as it used to be. We no longer get our bread from our grocery store shelf, instead D makes it from scratch. 

For some reason, the added effort that goes into the homemade bread makes me think twice about using it for PB&J; it's as if I feel like homemade bread deserves something a bit more extravagant than PB&J. So with that in mind, I decided to make the girls grilled cheese sandwiches and tomato soup for lunch. Seeing as I had two hungry girls waiting for lunch, I did a Google search for "quick tomato soup" and came up with this Rachel Ray recipe. I doubted that I could make a decent tomato soup in 20 minutes, but after a few modifications and a short 15 minute simmer, I had a tasty tomato soup that both girls gobbled up. Here's the recipe:

20 Minute Tomato Soup

Ingredients
32 ounces chicken broth (use vegetable broth to make vegetarian)
1-14.5 oz can diced tomatoes
1-14.5 oz can tomato sauce (no added sugar preferred)
1 cup whole milk
1/2-1 Tbsp Penzeys "Pasta Sprinkle" or a combination of basil, oregano, thyme, and garlic
Salt & Pepper to taste

DirectionsPulse diced tomatoes in food processor for approximately 15 seconds (OR you can skip this step and use the immersion blender before serving). Combine chicken broth, diced tomatoes, and tomato sauce in Dutch oven over medium heat. Bring to a slow boil, add milk and spices. Reduce heat to low, and simmer for 15 minutes, stirring occasionally. Serve with grilled cheese or crusty bread. 

**Also, can I just say how awesome Penzeys Spices is? We're fortunate enough to live in Wisconsin and have access to a brick and mortar store, but even if you don't, you should definitely check out their website or catalog. You will be hard-pressed to find a better selection of quality spices and knowledgeable employees anywhere.** 


Modified from Food Network's "Quick Creamy Tomato Soup"

Wednesday, October 22, 2014

Banana Chocolate Chocolate Chip Muffins Recipe

Banana Chocolate Chocolate Chip Muffins


My meal prep Sunday, carried over into Monday this week. Such is the life of a busy mom.  Since my 3.5 year old has several serious food allergies, I pack all of his meals for school: Breakfast, lunch and snacks. I needed to restock on breakfast muffins today. I had bananas that I needed to use, but couldn't find a recipe that I had all ingredients for, so I just converted my usual coconut flour pumpkin muffin into a banana muffin recipe. Sometimes we have to improvise! The best part, is that since I was using bananas, I didn't need to add any honey or maple syrup to sweeten them.
So, here is my newly created chocolate banana muffins! #paleo #grainfree #nutfree #dairyfree

Ingredients:
4 eggs
2 ripe bananas
1/4 cup melted coconut oil
1 tsp vanilla or 1 vanilla bean seed
1/3 cup coconut flour
2 tsp cinnamon
2 tbsp dark chocolate powder
1/2 tsp baking soda
Dash of sea salt
1/2 cup enjoy life chocolate chips (optional)

Preheat oven to 350.
Mix all wet ingredients until bananas are well blended. Add all dry ingredients, minus the chocolate chips. Once it is well mixed, stir in chocolate chips by hand.
Pour into lined muffin pan and bake for 30 minutes, or until toothpick inserted in middle comes out clean. 


Enjoy!
--C